Herbal Events at Madison Earth Care
More details coming soon...
Creating the Best At-Home Composting System
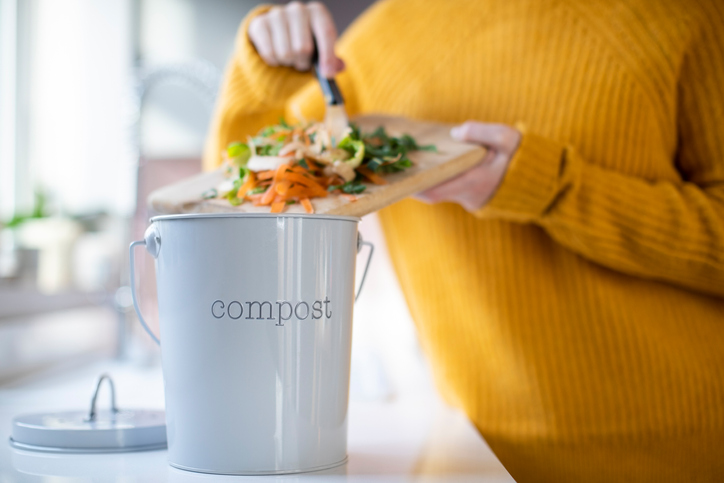
With landfills filling up and this planet crying for help, there’s no better time than now to start giving back to Mother Earth. One great way is to start a home composting system. Instead of pitching your kitchen waste in the garbage can and forgetting about it, why not recycle it into soil for your yard? You’ll reduce the amount of landfill waste and turn that biodegradable waste into nutrient-rich compost that you can use as free fertilizer for your garden or flowerbeds. It’s like turning your garbage into gold.
Composting isn’t just for serious gardeners anymore. We have some great tips to get you started on your own easy, at-home composting routine. Composting is not only an eco-friendly family project, but it also reduces your carbon footprint. Composting isn’t complicated, and your plants – and the Earth – will thank you.
What is Composting?
Composting is the organic breakdown of waste into soil. It’s nature’s perfect recycling system. You only need a few materials, in the right amounts, to create this precious dirt. You’ll need biodegradable “green” items (like coffee grounds, unused veggies, green grass clippings and discarded fruit or veggie peels), and “brown” bulking agents like leaves, newspapers and paper. Add some air, a little water, mix the pile occasionally, and that’s pretty much it.
Nature will take care of the rest, and your payout is the perfect mix of nutrients for your vegetable or flower garden or even your lawn. You may never need to buy environment-harming chemical fertilizers again.
Why Should I Compost?
Food waste makes up about 30 percent of the trash that ends up in U.S. landfills. Composting not only reduces the amount of garbage leaving your property, but it also cuts down on the production of landfill methane gases from rotting food. Methane gas is a major contributor to global warming.
Why not turn that waste into something good for the environment? Your own natural, composted material is a better fertilizing source for your soil and even helps soil retain water. Compost-fed
plants are healthier and resist pests better, so you can reduce bug-killing chemical applications. When it’s ready for use, completely broken-down compost looks like dark brown potting soil, crumbly and smelling like the earth.
How To Start Your Own Compost Pile:
Where Should It Go?
Let’s get started on this earthy journey. The first thing you’ll want to consider is where to put your compost bin or pit. If you’re building it directly onto the ground, look for a well-drained, semi-shady spot. Since your compost might be aromatic at times, you may not want to place it close to the house or along the fenceline, which might not please your neighbor. A convenient, yet not in-view spot is perfect. If you choose the bin system, the patio or deck may be a bit too cozy for both cookouts and compost. Try a little farther into the yard. You’ll want it near a water source, though, since you’ll be adding moisture occasionally.
The sky’s the limit when it comes to how you construct your composting system. Some systems are super simple: pick a location, pile organic debris, cover it, and turn it over every couple of weeks. However, if you have pets or live in areas with wildlife, this composting method leaves your system unprotected.
You could repurpose wood or concrete blocks to build a 3ft by 3ft enclosure around your future compost pile to contain the material and keep some critters out. You can add chicken wire or snow fencing around it and build the compost pile upward, too. The main goal is to contain the material as it breaks down while letting some air in.
Placing your compost pile directly on the ground encourages an exchange of nutrients and aerates the ground underneath. It also encourages earthworms to help in the breakdown process. However, don’t want too much rainwater on your pile, so you’ll need to maintain some kind of rain cover. Soggy piles don’t decompose well.
You can also design what’s called a “sheet composting system.” Pick a flat spot of ground or dig a trench and add material like newspapers and cardboard, fall leaves or pulled-up, disease-free fall garden plants. Layer next with organic matter or green grass clippings. Then, add nitrogen or some organic fertilizer to boost the process. You can then walk away and let it compost from fall to spring, tilling if needed. This type of composting is good in garden spots, as it helps replace critical nutrients in the soil.
If you prefer a “prettier” home composting system, consider turning a plastic bin or trash can with lid into a compost bin, or buying tumbler composting bins that are already made. Tumbler bins are easier to use and many include a rotating system so you don’t have to manually turn the materials with a shovel. Pre-made compost bins are more expensive, but they’re more visually appealing. They’re also more secure if you have night-time foraging critters like possums, raccoons or rodents. These systems also help regulate rain and odor better than open compost bins or pits. Enclosed bins generate more heat, too, so your material can compost faster.
Yet another form of recycling waste into soil is called worm composting, letting happy worms do the breaking-down work in plastic totes or other types of bins. This is a composting system that’s great for teaching kids and they love to participate in.
There are lots of websites online that show you how to make your own home composting system so you’re sure to find the best method for your individual needs.
Bigger Isn’t Always Better
Before you build a grand pile of compost, a word of caution: a bigger pile doesn’t mean a faster breakdown. Often, smaller piles or bins of compost break down more easily than a huge heap. Some methods of composting are more low-maintenance than others, but every kind needs to be maintained to encourage the decomposing process.
Patience
Composting isn’t a next-day gratification activity. In fact, it could take six months up to more than a year for materials to completely decompose and reveal rich, recycled compost. So, have some patience and enjoy the learning process and eventual beneficial results. You won’t need to babysit your compost pile every day, so it doesn’t take a lot of effort.
Build it Up
Once you have your composting bin set up (trench, pile, rotating bin or whatever method you choose), it’s time to start adding the fun stuff! There are composter recipes online and in books or you can try it on your own.
Think about items you throw away that break down naturally. These will do well in your compost bin. Food scraps, paper items like mail, newspapers, napkins, even pizza boxes (remove the grease stains before composting) work great. Don’t add anything that contains dairy, or is animal-based like meat, bones, fat or seafood, or starchy foods like potatoes. Those items tend to attract more pests and are trickier to compost safely.
If you use fertilizer or pesticides on your lawn or garden, do not use those grass clippings or plant material in your home compost pile. This introduces harmful chemicals into your compost. Also, you may be tempted to dispose of your pet’s “yard gifts” in the compost, but don’t put any meat-eating animal’s manure into the compost pile. Manure from herbivores (plant-eaters) is good, though.
Whenever you add material to your compost, try to chop it down into smaller chunks or crush it. The smaller the pieces are, the faster they’ll decompose. Big pieces, like branches or entire banana or citrus peels, take much longer to break down.
Greens and Browns
When you’re layering your compost pile, think “greens” and “browns.” The “greens” are nitrogen-rich items that add moisture and decompose fast. This process generates necessary “heat” to your pile. Examples of “greens” (not necessarily only green colors) are banana and citrus peels, crushed egg shells, coffee grounds, tea leaves, vegetables too old to eat, corncobs, green grass clippings, green hedge trimmings, and more.
“Browns” are another crucial element to the balance of your composting process. “Browns” are carbon-rich materials. They aerate your pile (bringing oxygen) and add substance to your compost bin. However, they break down more slowly than “greens,” so be sure to add them already in small pieces.
Browns include old newspapers, paper towel or toilet paper rolls, dried leaves, non-glossy junk mail, school papers, non-coated cardboard, pine cones, small twigs, straw, paper egg cartons (never styrofoam!), brown paper bags, carpentry wood shavings (make sure it’s not treated wood), and more.
Balance is the Key
To keep your compost pile balanced and actively breaking down, you’ll need more carbon (brown) than nitrogen (green). Try for a balance of 2/3 brown to 1/3 green. If your mix has too much green, it’ll become smelly. The ratio of nitrogen to carbon maintains a healthy composting balance and helps speed the breakdown process. Layer the greens and browns with some of your existing soil (to help encourage heat and keep smells down), and add some water for moisture. You can continue this layering a few inches at a time until your pile is a foot tall, or up to a few feet tall if it has supporting sides. Now, walk away from your new creation.
Turn, Turn, Turn
Every two weeks or so, turn your compost by mixing the layers with a shovel or pitchfork. Try to bring the inner layers to the edges, and the layers along the edges back into the center. This not only adds oxygen and balances the pile, but also gives you a good chance to examine it and amend it with more greens, browns or water. Look for earthworms, always a good sign.
Keep it Covered, Keep it Hot
If you have a homemade compost pile, keep it covered with plastic like a tarp, metal, even a discarded piece of carpet – something that will help keep the moisture and heat in. It also will help keep excess water out if you live in a rainy climate.
Your compost pile needs heat to help it more quickly break down organic materials. The heat also helps kill weed seeds that may have come from garden or yard clippings. At times – depending on your climate and time of year – you may see steam rising up from your compost. This is good! You can continue adding fresh material, keeping in mind the proper green to brown ratio. When you do add items, turn the new material into the composting material and add a bit of water if needed.
Feed Your Compost Bin
After establishing your home composting system, you don’t have to run outside with every discarded orange rind or carrot peel. Keep a container with a lid under your sink and place the compostable items in there instead of disposing in your regular kitchen trash. When your smaller compost trash bin is full (or aromatic), take it outside and dump it in your compost bin. Just remember to turn the pile so the new is mixed in with the decomposing stuff.
The more you work with your compost pile, the better you’ll become at recognizing what works (decomposes) and what doesn’t. For instance, you’ll soon learn that if your compost pile starts stinking, it’s either too wet and needs more browns added, or it needs more air, so you’ll need to “turn” the pile with a shovel, pitchfork or rotation (depending on your chosen composting system).
If the breaking-down process seems to have stalled, try adding more greens. And if you don’t get the balance just right, that’s OK, too – the great thing about composting is you can always change things up by adding one or the other, more water or less, or turning more often or less often.
Adding Activators
If you find your compost pile just isn’t breaking down or you don’t have the proper nitrogen/carbon/moisture combination, you may need to add a commercially made compost activator. This product can help balance nitrogen and carbon in your “percolating” pile so the process moves along more quickly and efficiently.
- Try using the Neptune’s Harvest Seaweed Fertilizer that we carry in the Garden Center as a great boost to your home compost bin.
How to Use Finished Compost
So, you’ve turned, added, and at times ignored your compost bin. One day, those leaves, twigs, lemon rinds and apple peelings have transformed into marvelous, loamy, rich dark soil brimming with the nutrients your plants crave. How can you use it?
Mix your finished compost into your existing soil, whether that’s in a flower or vegetable garden, patio pot or landscaping. Sprinkle it onto your lawn and water it in. Compost helps balance your existing soil, which is probably depleted. Compost also helps retain ground moisture so you won’t have to water as often.
Never Buy Fertilizer Again
Your journey in composting has just begun, and it’s a rewarding learning process. With a surge in people wanting to grow their own food, encouraging and informative sources for composting are all around. Talk to members of local gardening clubs, visit garden centers, or join social media gardening and composting groups. Experts at your local cooperative extension service can provide soil testing and advise you on the best composting systems for your particular climate.
You’ll make mistakes while composting, and that’s OK. The pile forgives you. Once you go through this process a time or two, you’ll get the hang of it, and the composting process will become easier and faster as you connect with nature. You’ll love how composting benefits your flowers, garden and yard with the exact, recycled nutrients they need. It’s a natural, recycled bon appetit for your yard.
Where to Buy Compost
If after reading this great article by Hermann Sammano you realize that composting really isn’t for you, don’t worry, we’ve got you covered with two of our favorite bagged composts from Coast of Maine;
&
Schoodic Blend Cow Manure Compost
We also sell bulk organic compost by the cubic yard and new this year a 50/50 Topsoil and Organic Compost Blend that is ready for planting.
Visit the shop to check them out or contact us for delivery.
Here is a list of some of our most popular bagged soils, fertilizers and grass seeds.
Everything is available for delivery.
Use our contact form here to order.
In the next days we will be working to make all of these available quickly and easily in our online shop.
Thank you so much for continuing to shop local, we appreciate you.
Bar Harbor Blend Organic Potting Soil

Uses: House plants, hanging baskets, window boxes, container gardens
Coast of Maine Organic Products Bar Harbor Blend Organic Potting Soil is a lightweight soil mixture made with salmon, blueberry, lobster and other composts, as well as calcium and chitin-rich lobster shells, sphagnum peat, perlite and kelp meal. It is dark brown in color and provides the perfect balance between water retention and drainage needed for healthy plants. It is OMRI listed for use in organic gardens.
Available in 8qt and 1cf bags
$5.99-$8.99
Sprout Island Organic Seed Starter
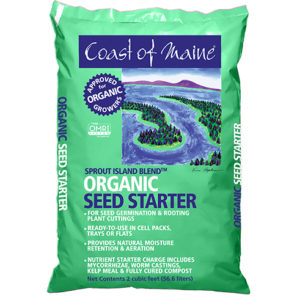
Uses: Seed germination and starting root cuttings
Coast of Maine Organic Products Sprout Island Organic Seed Starter is a rich mixture of blended sphagnum peat moss, perlite, kelp meal, worm castings and well-aged compost. It contains mycorrhizae and is ready to use in cell packs* or flats and provides natural moisture retention and aeration. It has a mild organic fertilizer charge that creates a biologically diverse environment ideal for germinating seeds and root cuttings.
*We recommend cell packs sized 72 or larger.
It is OMRI listed for use in organic gardens.
Available in 8 Quart bags $7.99
Quoddy Blend Lobster Compost
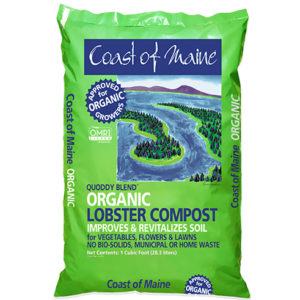
Coast of Maine Organic Products Quoddy Blend Lobster Compost is made with chitin and calcium-rich lobster shells, compost and sphagnum peat moss. It is a dark-brown, complex soil filled with naturally occurring microorganisms all plants need for healthy growth. It drains well and is an ideal soil conditioner for existing beds that need reinvigorating.It is OMRI listed for use in organic gardens.
Schoodic Blend Cow Manure Compost
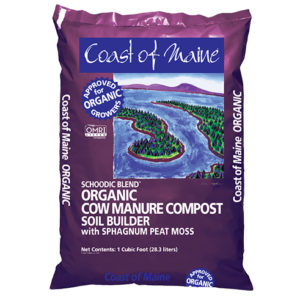
Uses: Conditioning vegetable gardens and flower beds
Coast of Maine Organic Products Schoodic Blend Cow Manure Compost is a dark, rich soil made from carefully composted cow manure blended with sphagnum peat moss. The result is an all-natural, easy-to-use, all-purpose organic soil amendment that can be used to recondition poor garden soil or help start new plantings of trees and shrubs.
It is OMRI listed for use in organic gardens.
Available in 1 cubic foot bags $8.99
Monhegan Blend Black Earth
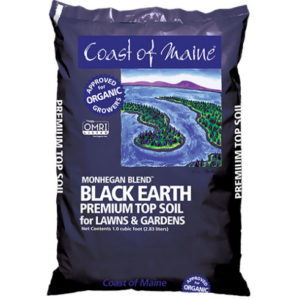
Uses: Top dressing lawns, filling in bare spots, general purpose soil amendment
Coast of Maine Organic Products Monhegan Blend Black Earth Premium Top Soil is made from peat and composted farm manures. The result is an easy-to-use, rich, soil blend that supports microorganisms necessary for a healthy lawn which will naturally resist drought, weeds and disease.
It is OMRI listed for use in organic gardens.
Available in 1cf bags $8.99
Bio-tone Starter Plus
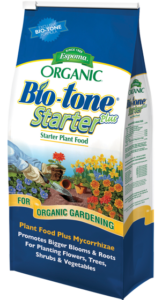
The Ultimate Starter Fertilizer with both Endo & Ecto Mycorrhizae
Uses:
- Grows larger root mass to help plants establish fast
- Reduces transplant loss
- Promotes bigger blooms
- Microbe enhanced all natural organic fertilizer with no sludges or fillers
Available in 8lb bags $18.99 and 25lb bags $ 39.99
Holly-Tone
The Original Natural & Organic fertilizer for all acid loving plants.
- The #1 choice for feeding hollies, azaleas, camellias, evergreens, dogwoods, rhododendrons & more!
- Get more blooms with more vibrant color.
- Grow larger plants with deeper green color.
- Long lasting, slow-release feeding with our exclusive Bio-tone Microbes.
Available in 8 lb bags $11.99 , 18 lb bags $18.99 and 50 lb. bags $44.99
Garden-tone
Natural & Organic fertilizer for an abundant harvest
- Grow delicious cool and warm season vegetables like lettuce, kale, tomatoes, peppers & squash
- Use for herbs like basil, chives, sage, rosemary, parsley & oregano
- Long lasting, slow-release feeding with our exclusive Bio-tone Microbes
- Grow an abundant harvest of nutritious & flavorful vegetables
- 100% natural & organic ingredients with no fillers or sludges
Available in 4lb bags $7.99 and 36 lb. bags $36.99
Flower-tone
Natural organic fertilizer & Blossom Booster
- For both annuals & perennials
- Get larger and more abundant blooms
- Long lasting, slow-release feeding with our exclusive Bio-tone Microbes
- 100% natural & organic ingredients with no fillers or sludges
Available in 4 lb bags $ 7.99
Cactus Mix
All natural potting soil mix for cactus, palm & citrus
- Provides optimum aeration & drainage.
- Promotes root growth.
- For all cactus & succulents
Available in 4qt bags, $3.99 and 8 qt bags $5.99
Green Up Lawn Fertilizer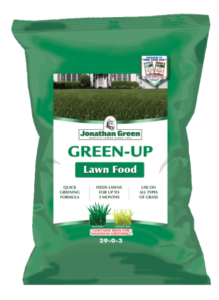
Fertilizer analysis: 29-0-3
- Quick, greening formula for all grass types
- Slow release nitrogen is unaffected by excessive rainfall
- 4% iron for maximum greening
- Continuous feeding for up to 3 months
Available in:
5,000 sq.ft. $17.99
15,000 sq.ft. $44.99
Green up Fertilizer for Seeding and Sodding
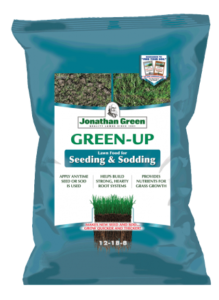
- Fertilizer analysis: 12-18-8
- High phosphorus formula helps to develop deep, dense roots
- Apply the same day as seeding or sodding
- Contains humates to get new lawns off to a great start
- Feeds for up to 2 months
- Germinates and establishes quickly
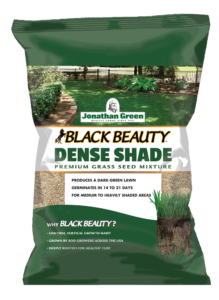
- Has been proven to grow where other shady lawn seed mixtures have failed
- Perfect for use around mature trees and shrubs where the penetration of sunlight is limited
- Improved turfgrass varieties possessing beneficial endophytes for natural insect and disease resistance
By: Gisella Weissbach-Licht| Garden Services Manager, CANP, AOLCP, UCONN MG
Berries in your Garden?
It is time to prune them while they are dormant, the latest by the middle of March. Yearly pruning increases your harvest and keeps the plants happy and healthy.
Pruning Guidelines for small fruit bearing shrubs
Blueberries, Currants, Gooseberries, Elderberries, etc.
Start with the dead and diseased branches and then move on to the branches that rub against each other. Rubbing injures the branches and the resulting lesions will provide an opening for bacteria, fungi and pests. Then cut out all branches that grow towards the center of the bush to avoid that rubbing branches develop. This technique also allows for more airflow and light to enter the center. In the case of blueberries remove all branches thicker than an inch as they will not produce only a limited amount for fruit and discourage the plant from growing new branches from the bottom up.
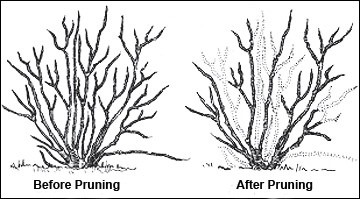
Because negative results from a lack of pruning do not show up immediately, sometimes bushes will go un pruned for years. So, if you are just now inspired to prune your bushes, keep in mind that the past “neglect” cannot be fixed in just one season.
Thus, be careful not to get carried away … the rule is don’t remove more than one third of the shrub in one season (unless dead, diseased, damaged or weak).
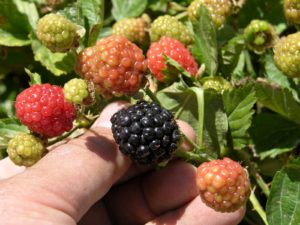
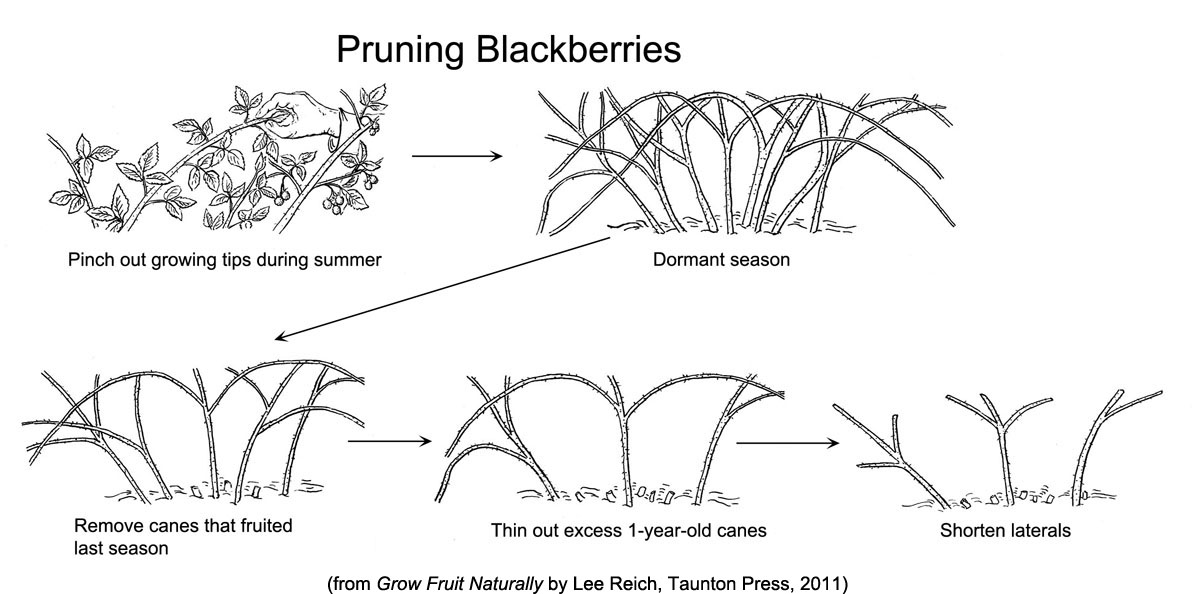
Pruning Guidelines for Brambles or Caneberries
Raspberries and Blackberries
Brambles are now called caneberries. It is most important to understand that the root system and crown of these plants live for a long time, while the canes themselves are “biennials”, i.e. living for two years only. In the first year the canes simply produce leaves and no fruit, in the second year they produce fruit and then die back. However, be aware that there are some varieties that bear berries in the fall of their first year. After the harvest prune the canes that bore the fruit to the ground.
While the plants are still dormant, apply the same principles as for bushy fruit bearers, i.e. remove all dead, diseased and damaged canes as well as weak and low growing canes. In addition, prune the healthy lateral canes back to about 12-18 inches on blackberries and about 8-10 inches for raspberries. Also leave only about 4-6 canes per foot.
Resources
There are lots of plant-specific pruning and growing instructions (including videos) on the internet. Look for the ones that end with “edu” as they are created by University Departments and are typically based on solid evidence. Here is some reading material (note that we have included one article from the UK, as currants and gooseberries are from Europe and Asia):
https://hortnews.extension.iastate.edu/2007/2-7/smallfruit.html
polk.extension.wisc.edu › files › 2014/02 › Blueberry-Pruning-Rejuv…
https://blog.primrose.co.uk/2019/03/29/pruning-currants-gooseberries-jostaberries/
Call in the professionals
If all of this sounds a bit to complicated for you, or you would like to get your fruiting shrubs and canes off to a healthy start this season, we would be happy to come in and do the pruning for you. Call or email us here and we can set up a no obligation consultation.
Come check out our Garden center for all of your home pruning must haves. Pruners, loppers, gloves and more. New Spring hours next week!